Address Resolver
Different companies may choose to use different pseudo-identity, some of these identifiers are reused and some are not. For those companies who chose to reuse a pseudo-identity, there is almost always a need to point to them again when doing transactions because it acts as an identifier to the user / company when doing transactions with them. Examples of such resources could be a shipping line wallet, multi-sig wallet or eBL token registry. Read more about identifier resolution framework here.
TrustVC's address resolution
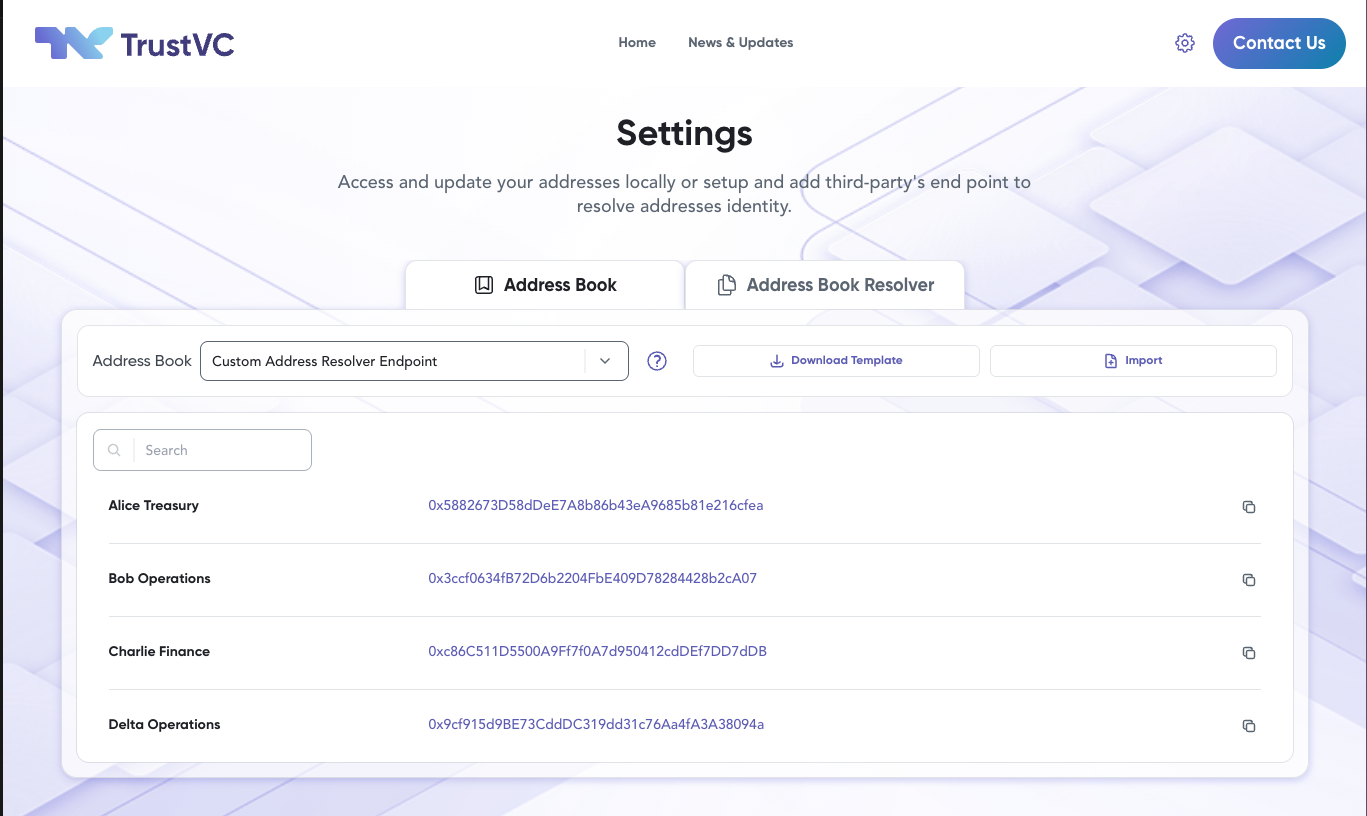
For TrustVC, currently there are 2 ways of resolving identities, 1 is through a local address book, the other is via 3rd party resolver API. These are accessible from the gear icon on the far right of the top navigation bar on the TrustVC website.
For implementation reference, see the TrustVC package. The
@trustvc/trustvcpackage is used for document verification and does not expose dedicated address-resolver APIs, so address resolution is configured and handled at the application settings layer.
Address Book (Local)
Address Book is like a local phone book. The data is in a csv/excel format, where the minimal required columns are:
Name(refers to the resolved company or entity name)Address(refers to the Wallet address)
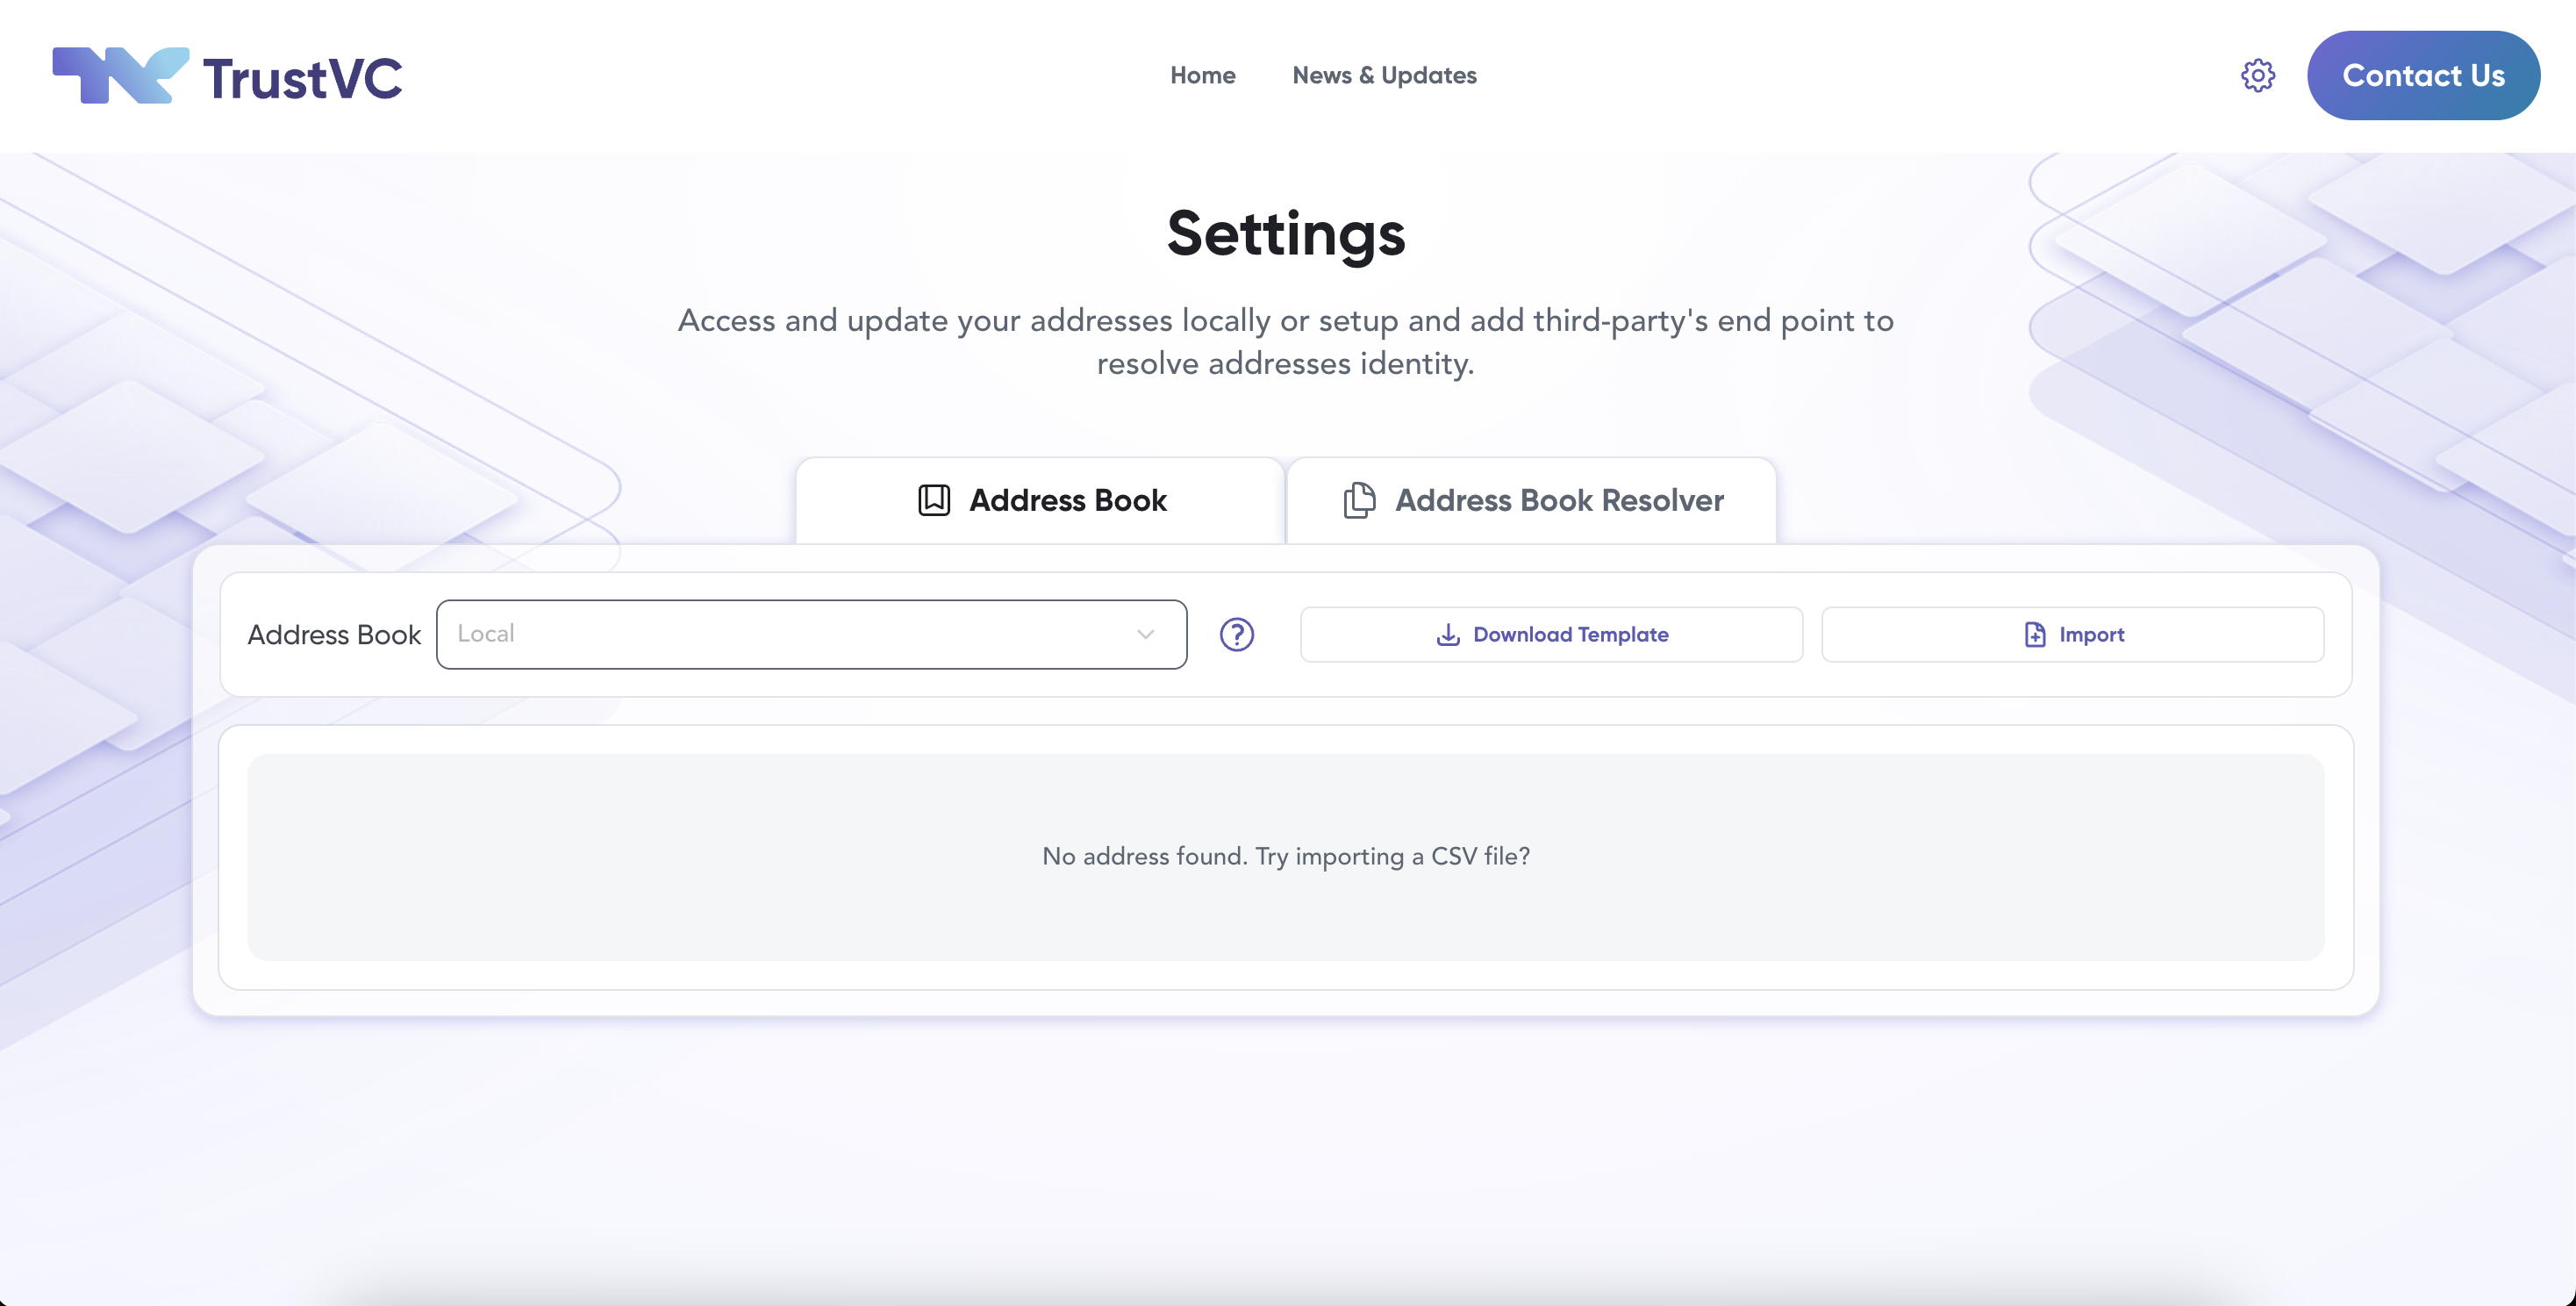
After importing the csv/excel sheet, previously ethereum addresses (where resolvable) should now be resolved to recognizable identities as defined within the imported sheet.
Setup
So to recap the steps on setting your own local addressbook:
-
First, prepare a csv/excel sheet with
NameandAddresscolumns. For example:
-
Develop an import csv file feature in your application. You'll need to:
-
Convert file to string. For example:
const readAsText = async (file: File): Promise<string> => {return new Promise((resolve, reject) => {const reader = new FileReader();reader.onerror = () => reject(reader.error);reader.onload = () => resolve(reader.result as string);reader.readAsText(file);});}; -
Then convert string to key value object. For example:
import { parse } from "papaparse";const csvToAddressBook = (csv: string) => {const parsed = parse(csv, { skipEmptyLines: true, header: true });const data = parsed.data;const addressBook: Record<string, string> = {};data.forEach((row: any) => {const nameText = row.Name || row.name;const addressText = row.Address || row.address;if (!addressText || !nameText) return;addressBook[addressText.toLowerCase()] = nameText;});return addressBook;};const csv = await readAsText(file);const addressBook = csvToAddressBook(csv);
-
-
Finally, if a local address matches, return the
Namefrom your csv/excel file.const addressToMatch = "0xabc..."; // your local addressfor (const [key, value] of Object.entries(addressBook)) {if (addressToMatch === key) {return value;}}
Address Resolver (Third party)
Third-party resolver lets you fetch address book entries from an external endpoint instead of importing CSV manually. Think of it as a remote address book that returns name/address pairs in JSON.
In the settings page you can add your third-party resolver endpoint to resolve Ethereum addresses to a company's name. With Ethereum addresses being cryptic to end users, this Address Resolver acts like a digital contact list where users see familiar identifiers such as ABC Pte Ltd. Once the endpoint is added and saved, resolvable Ethereum addresses appear with their resolved name:
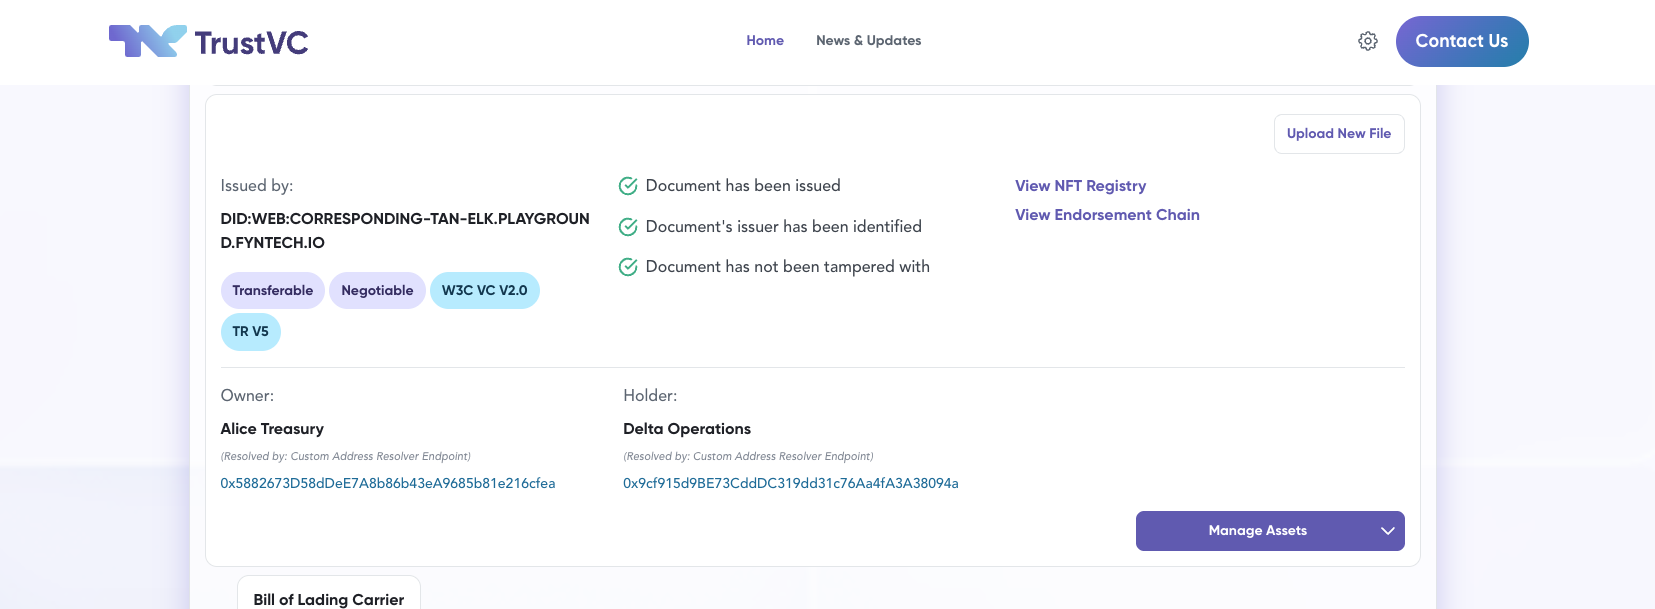
You can see that the company's name and resolver details will also be displayed above the resolved Ethereum address.
How to set up a 3rd party Address Resolver
1) Create an endpoint that returns JSON
Your endpoint must return an array of objects with:
name: display label (for example, company name)address: Ethereum wallet address
Supported response shapes:
[
  { "name": "Alice Pte Ltd", "address": "0x1111111111111111111111111111111111111111" },
  { "name": "Bob Shipping", "address": "0x2222222222222222222222222222222222222222" }
]
or nested under one of these keys:
{
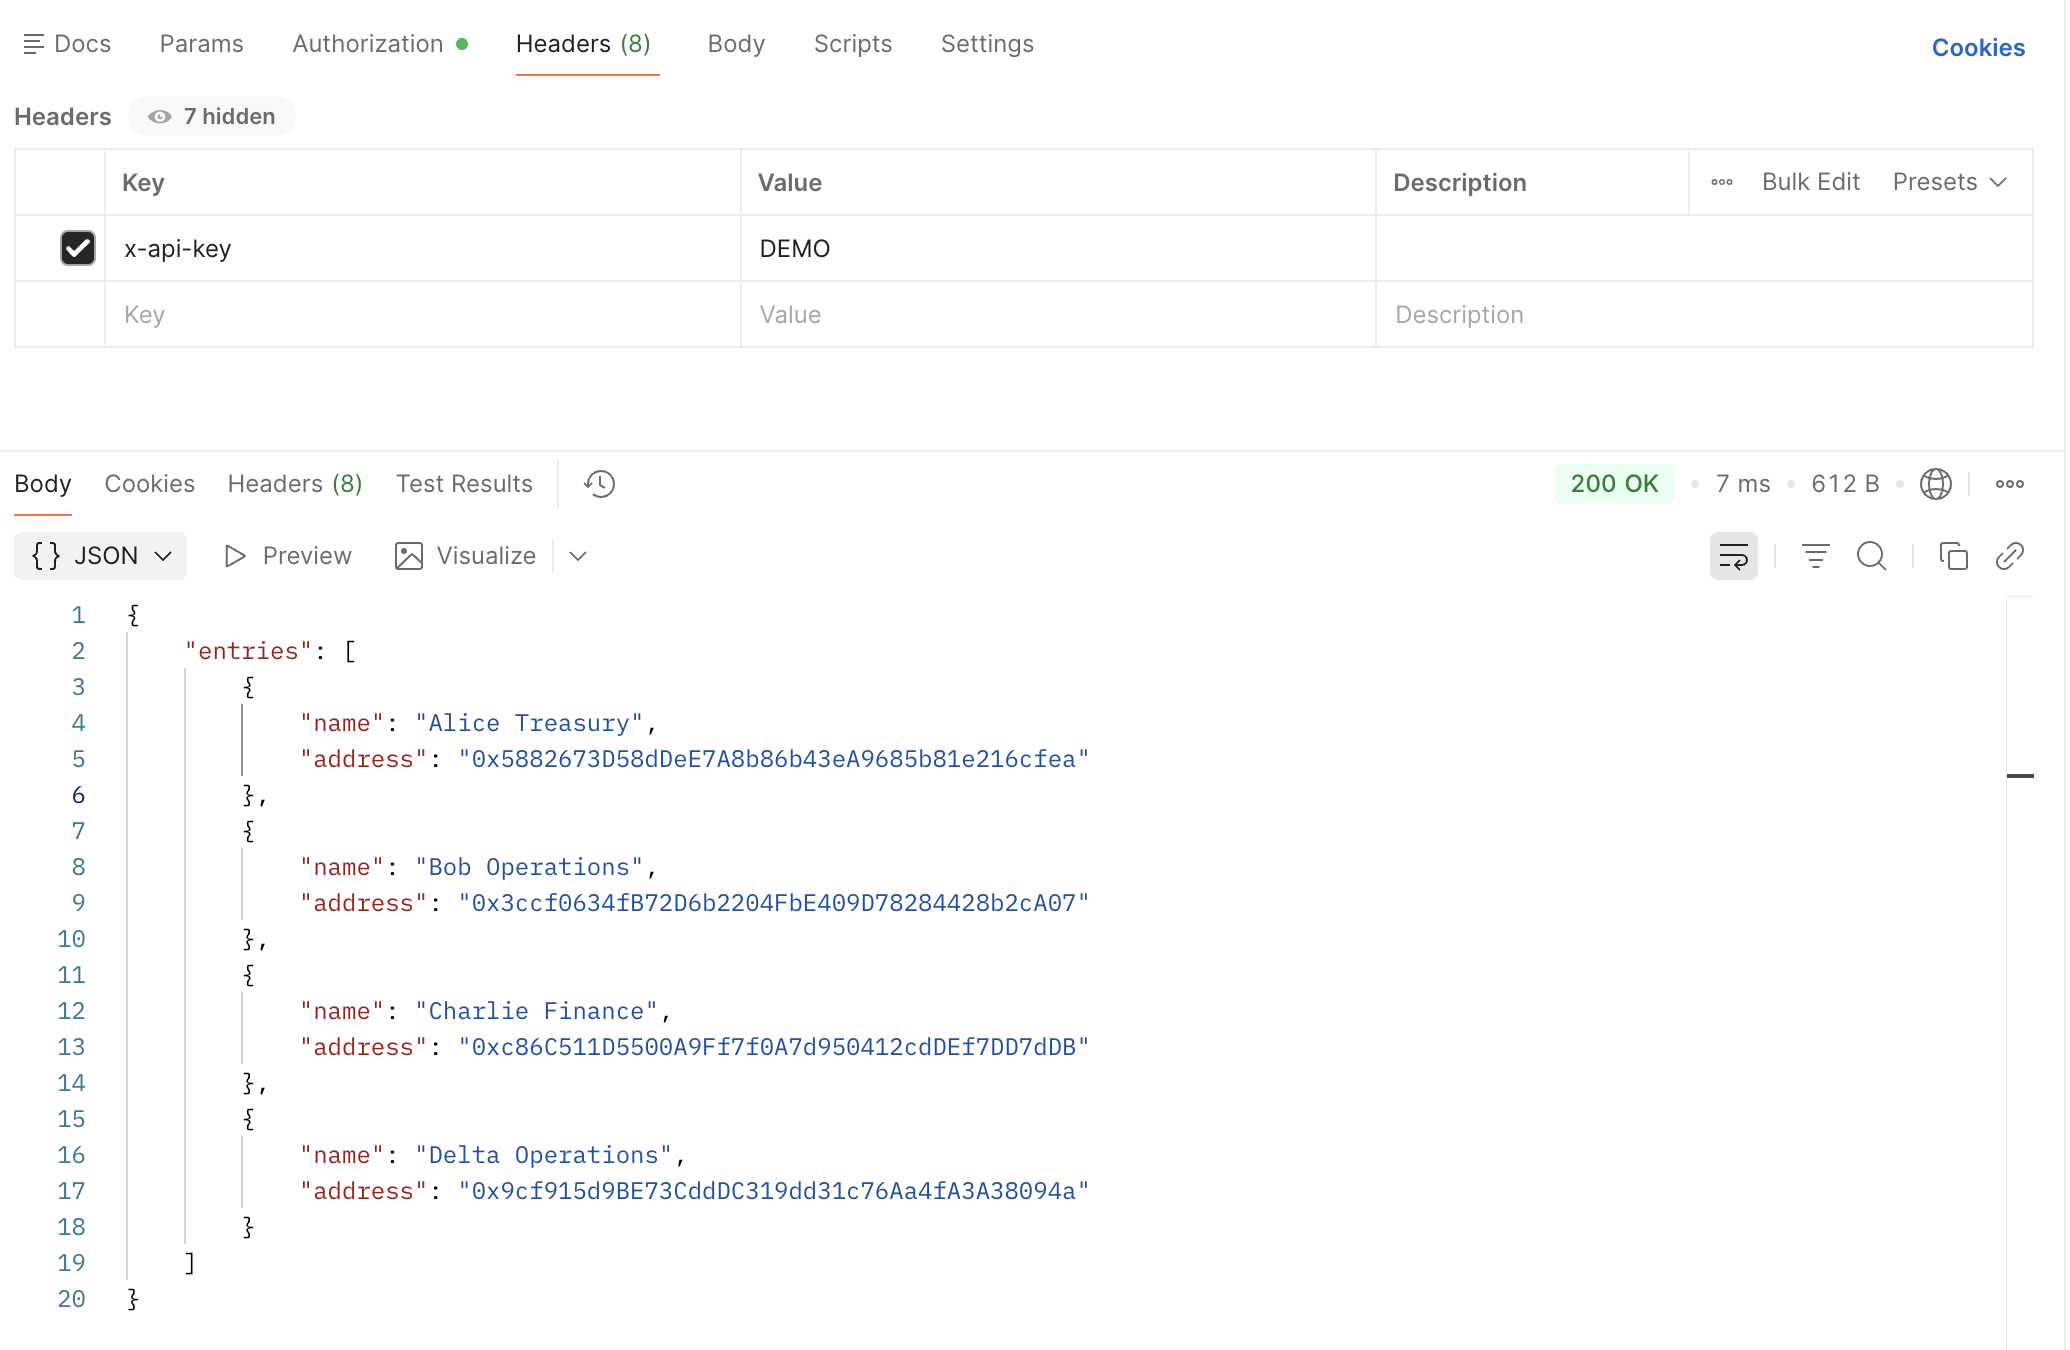
  "entries": [
    { "name": "Alice Pte Ltd", "address": "0x1111111111111111111111111111111111111111" }
  ]
}
{
  "results": [
    { "name": "Alice Pte Ltd", "address": "0x1111111111111111111111111111111111111111" }
  ]
}
2) Host the endpoint
You can host it using either:
- Simple: static JSON file on a public URL (for example GitHub Pages, S3, or any static host)
- Advanced: API endpoint (for example Node/Express, Python/Flask, serverless functions)
For production, secure your resolver endpoint.
- If your endpoint is protected, configure an API header and API key in resolver settings (for example
x-api-key+ your token).
3) Configure resolver in Settings
-
Go to the website application. Click the
+ Addbutton in the Settings page: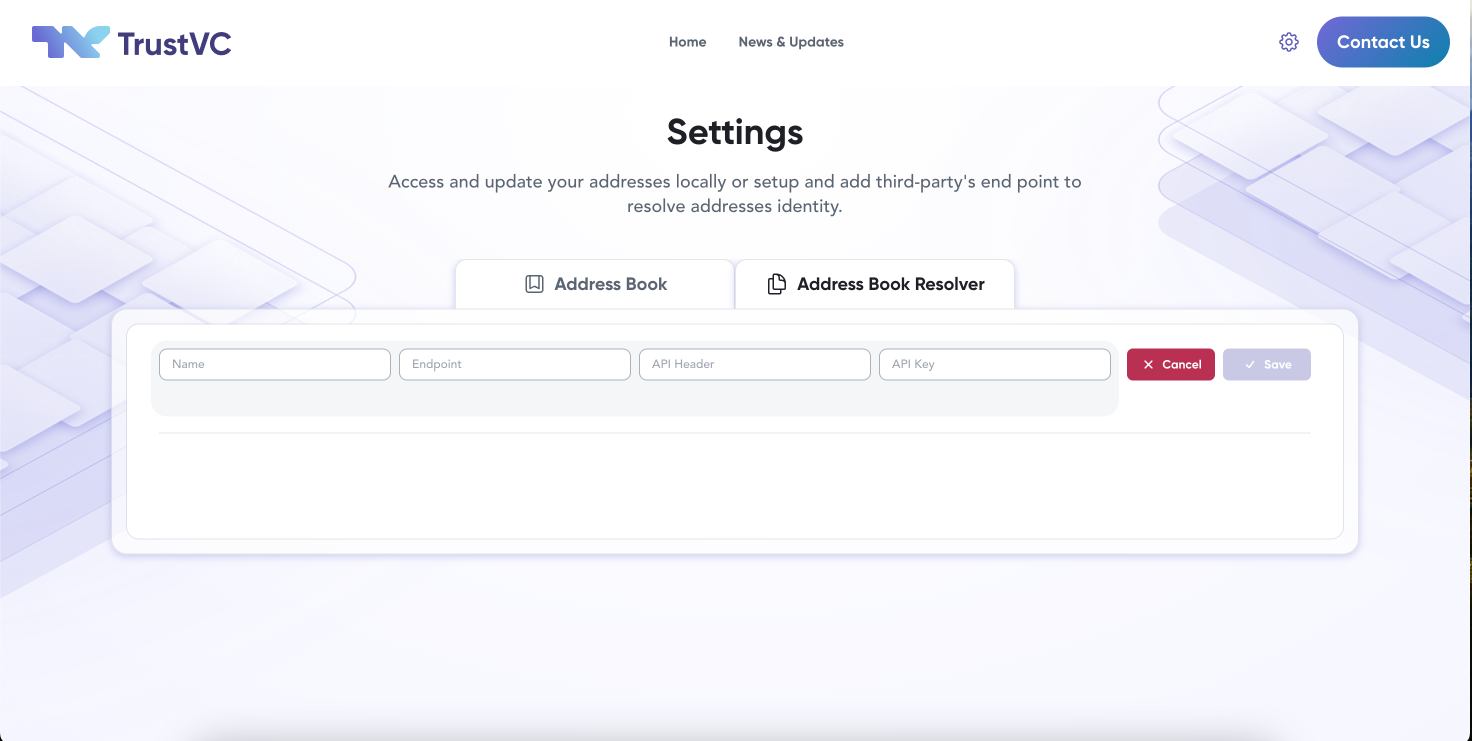
-
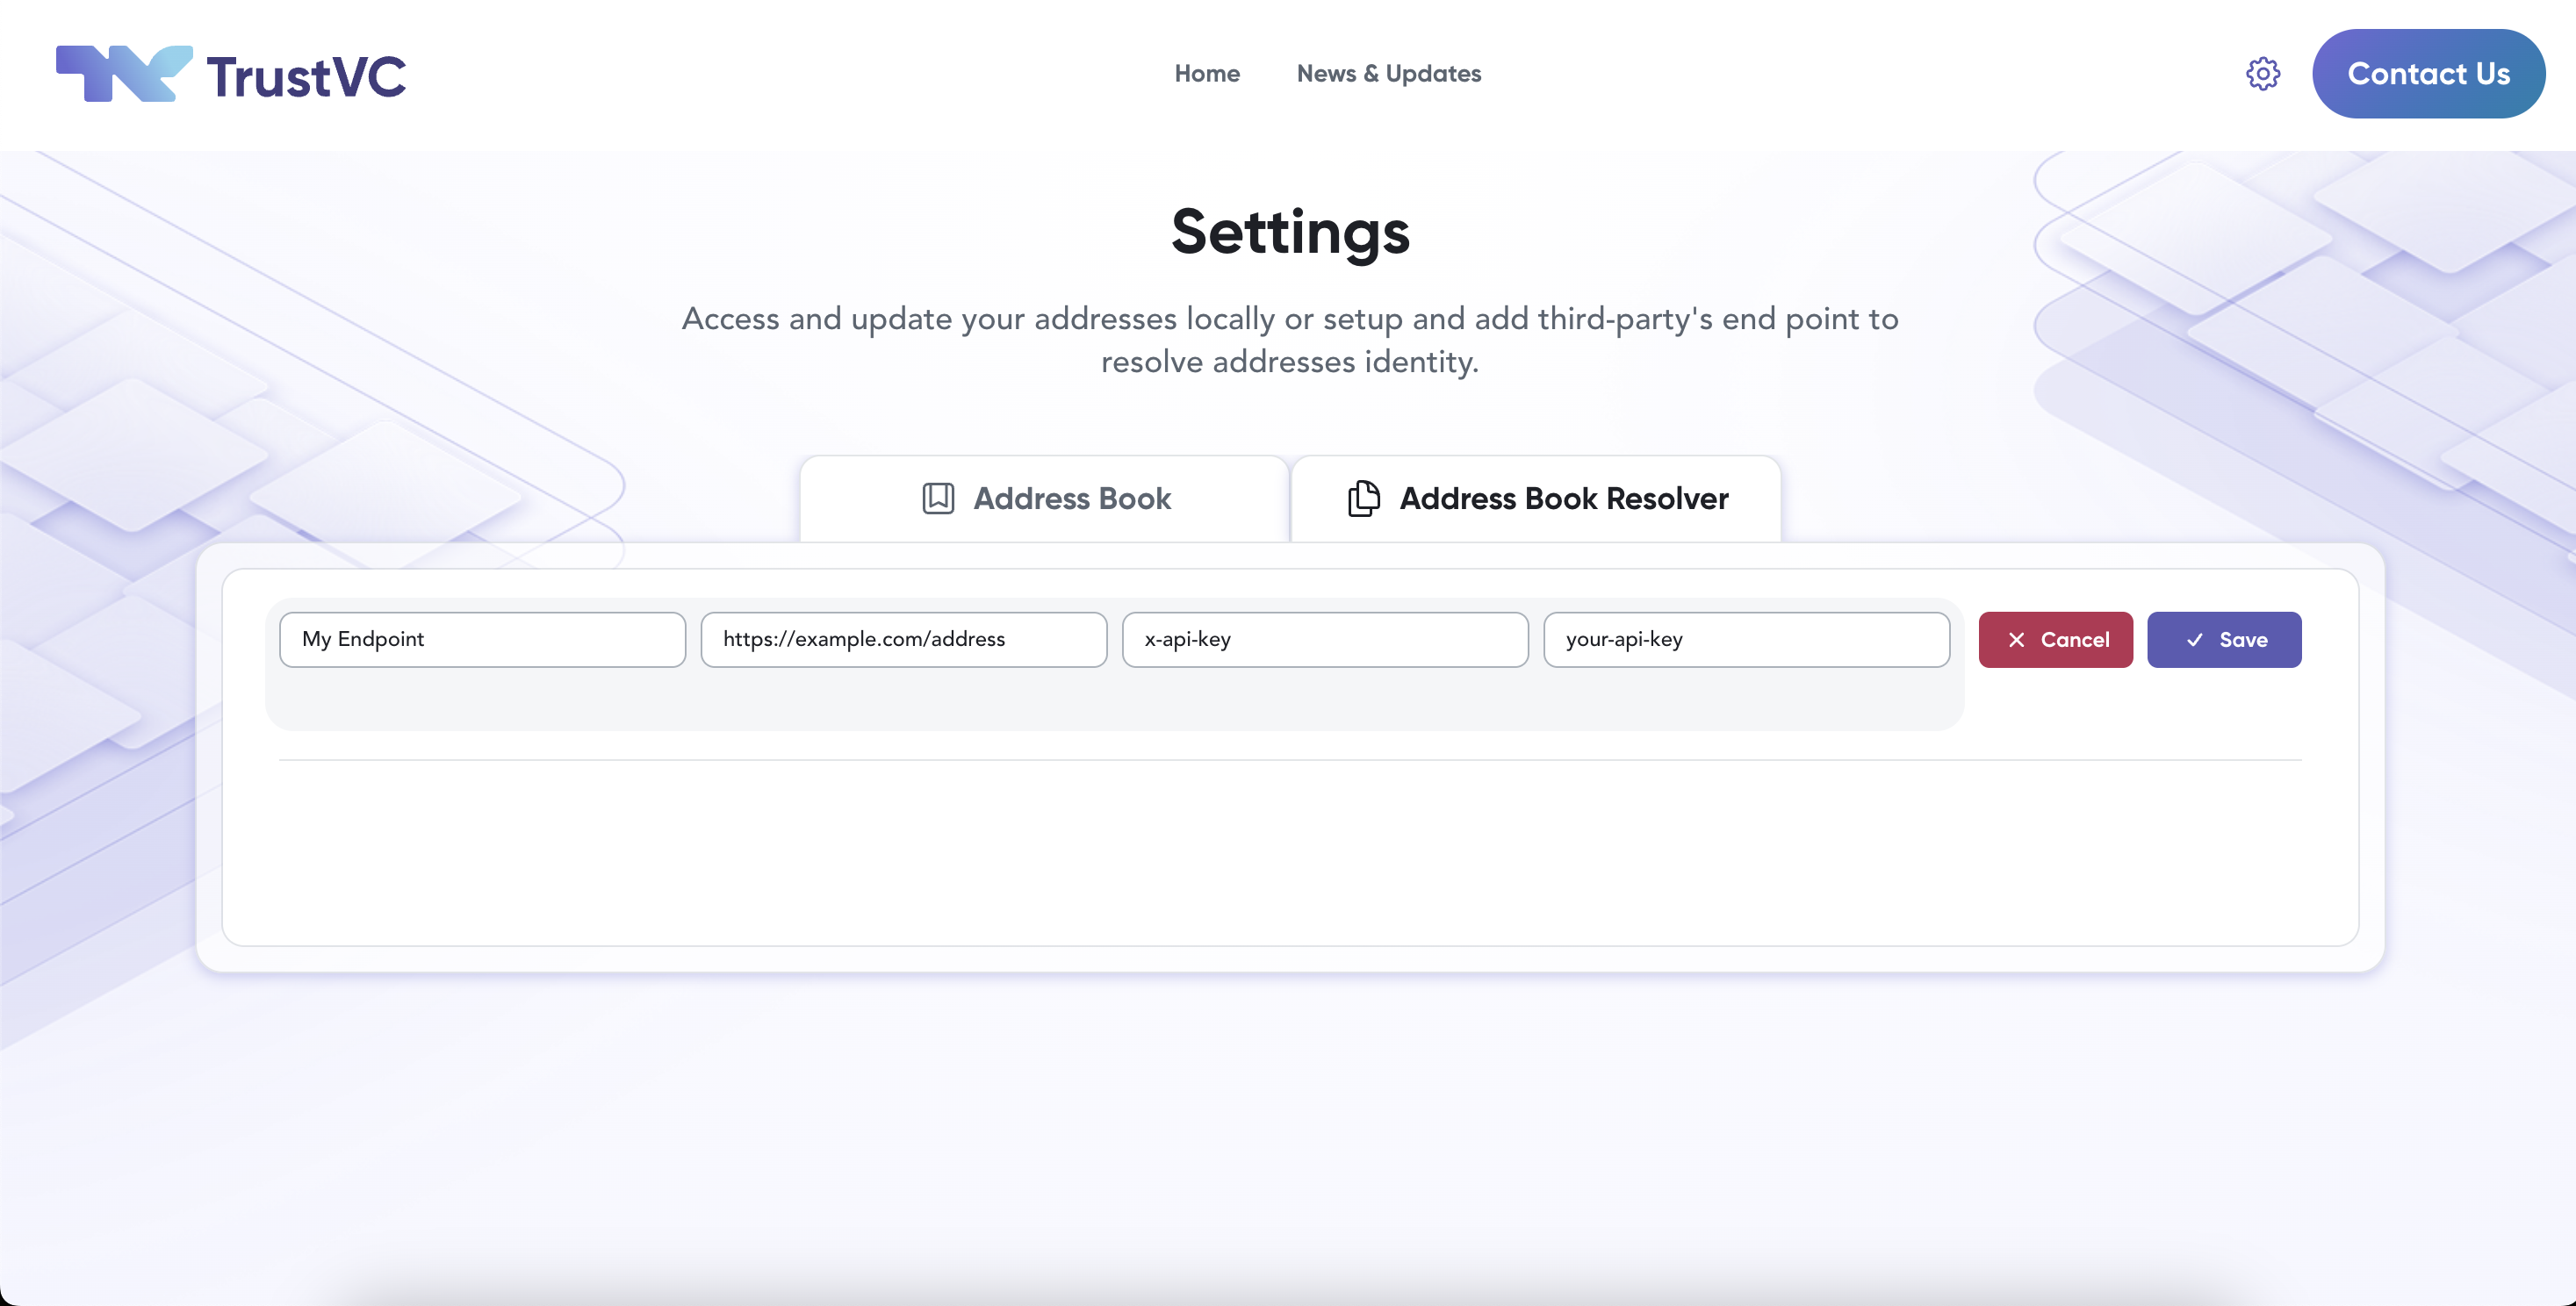
Fill in:
name(label for this resolver; shown as "Resolved by")endpoint(the URL returning JSON entries)API HeaderandAPI Key(optional; use for protected endpoints, for exampleX-API-Key+secret123)
Name
The "Name" input refers to the name of the address resolver that contains all the mappings of companies and their respective Ethereum address. For example, "BANKS.SG" could be the address resolver for all banks in Singapore.
Endpoint
The "Endpoint" input is the URL that will be called to resolve an Ethereum address.
Use the URL of your own deployed resolver service.
Example: https://resolver.your-domain.com/api/resolve.
Note: For production environments, host and secure your own resolver endpoint.
API Header and API Key
For the API to know that you are an authorised user, an API Key is required and you will need to pass it in through an
API Header. An example would be x-api-key for the API Header and DEMO for the API Key.